Electron基础入门
Electron
使用 JavaScript,HTML 和 CSS 构建跨平台的桌面应用程序。
目录
- 安装依赖
- 基础开发
- 编译打包
1.安装依赖
全局安装electron:
npm i -g electron初始化项目:
npm init -y生成package.json创建一个基础的Electron项目如下:
1
2
3
4
my-electron-app/
├── package.json // 依赖关系
├── main.js // 主进程函数
└── index.html // 主页面具体代码如下:
main.js
1 | var electron = require('electron') |
index.js
1 |
|
- 运行项目:
electron .
2.基础开发
读取文件信息
1
2
3
4
5
6
7
8
9
10
11
12
13var fs = require('fs')
// 读取文件信息
window.onload = function(){
var btn = this.document.querySelector('#btn')
var body = this.document.querySelector('#text')
btn.onclick = function(){
fs.readFile('data.txt',(err,data)=>{
body.innerHTML = data
})
}
}
新开窗口
1
2
3
4
5
6
7
8
9
10
11
12
13
14
15const btn2 = this.document.querySelector('#open1')
const BrowserWindow = require('electron').remote.BrowserWindow
window.onload = function(){
btn2.onclick = ()=>{
newWin = new BrowserWindow({
width:500,
height:500
})
newWin.loadFile('blue.html')
newWin.on('closed',()=>{
newWin = null
})
}
}
浏览器打开链接
1
2
3
4
5
6
7
8var {shell} = require('electron')
var aHref = document.querySelector('#aHref')
aHref.onclick = function(e){
e.preventDefault()
var href = this.getAttribute('href')
shell.openExternal(href)
}
离线 \ 上线事件
1
2
3
4
5
6
7
8
9window.addEventListener('online',function(){
alert('来网了!!!')
console.log('1')
})
window.addEventListener('offline',function(){
alert('断网了啊!!!')
console.log('0')
})
消息通知
1
2
3
4
5
6
7
8
9var notify_btn = document.getElementById('notify_btn')
var option = {
title:'来订单了!',
body:'你的消息到了'
}
notify_btn.onclick = function(){
new window.Notification(option.title,option)
}
打开子窗口
1
2
3
4
5var btn = document.querySelector('#btn2')
btn.onclick = function(e){
window.open('./mini_window.html')
}
子窗口向父窗口传递信息 - 通过message事件监听
1
2
3
4
5
6
7
8
9
10
11
12
13
14
15
16
17
18
19
20
21
22
23
24
25
26
27
28//父窗口 获取子窗口信息
window.addEventListener('message',(msg)=>{
let myMessage = document.querySelector('#myMsg')
myMessage.innerHTML = JSON.stringify(msg.data)
})
// 子窗口 发送信息
<html lang="en">
<head>
<meta charset="UTF-8">
<meta http-equiv="X-UA-Compatible" content="IE=edge">
<meta name="viewport" content="width=device-width, initial-scale=1.0">
<title>Document</title>
</head>
<body>
<h2>wo shi zi chuang kou</h2>
<button id="popup">发送信息给父窗口</button>
</body>
<script>
var popup = this.document.querySelector('#popup')
popup.onclick = function(e){
window.opener.postMessage('我是子窗口的信息')
}
</script>
</html>
文件选择对话框
保存文件对话框
消息对话框
1
2
3
4
5
6
7
8
9
10
11
12
13
14
15
16
17
18
19
20
21
22
23
24
25
26
27
28
29
30
31
32
33
34
35
36
37
38
39
40
41
42
43
44
45
46
47
48
49
50
51
52const {dialog} = require('electron').remote
// 文件选择框
var open_img = document.getElementById('open_img')
open_img.onclick = function(e){
dialog.showOpenDialog({
title:'选择你选择的照片',
defaultPath:'photo.jpg', // 默认路径
filters:[ // 过滤文件类型
{name:'img',extensions:['jpg']}
],
buttonLabel: '打开图片' // 自定义按钮
}).then(res =>{
let img = document.getElementById('img')
img.setAttribute('src',res.filePaths[0])
}).catch(err=>{
console.error(err)
})
}
// 保存文件对话框
var save_file = document.getElementById('save_file')
save_file.onclick = function(){
dialog.showSaveDialog({
title:'保存文件'
}).then(res =>{
console.log(res)
fs.writeFileSync(res.filePath,'save file to txt.')
}).catch(e =>{
console.error(e)
})
}
// 消息对话框
var dialog1 = document.getElementById('dialog')
dialog1.onclick = function(){
dialog.showMessageBox({
type:'warning',
title:'标题栏',
message:'是不是要去吃饭?',
buttons:[
'我要去','我不去'
]
}).then(res =>{
console.log(res)
}).catch(e =>{
console.error(e)
})
}
设置目录菜单
1
2
3
4
5
6
7
8
9
10
11
12
13
14
15
16
17
18
19
20
21
22
23
24
25
26
27
28
29
30
31
32
33
34
35
36
37
38
39
40
41// menu.js
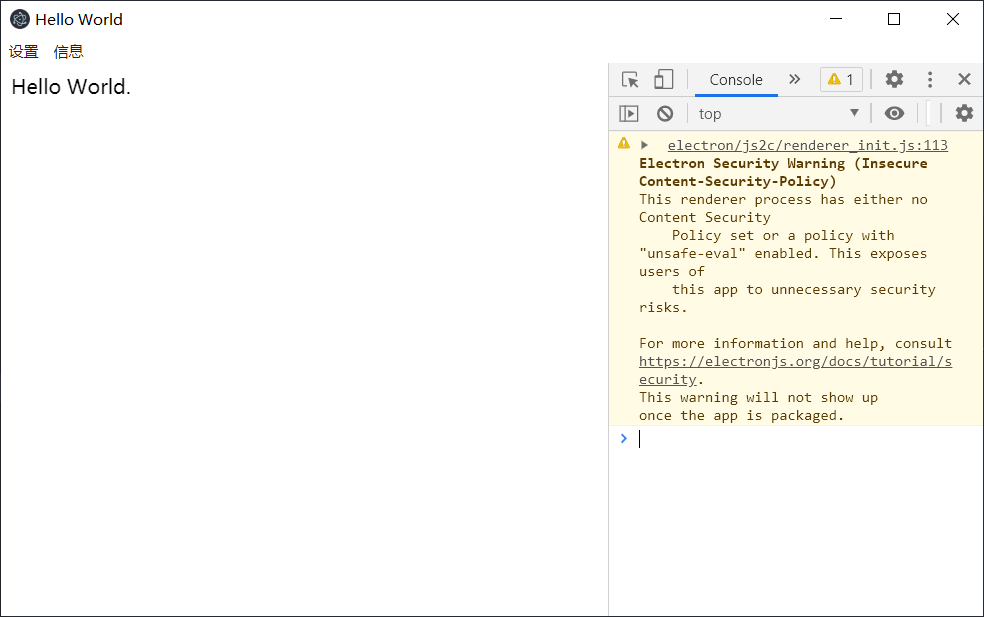
const { Menu,BrowserWindow }= require('electron')
var template = [
{
label: '设置',
submenu:[
{
label: '字体',
accelerator:'ctrl+n',
click:()=>{
var win = new BrowserWindow({
width:500,
height:500,
webPreferences: {
nodeIntegration: true,
enableRemoteModule: true
}
})
win.loadFile('blue.html')
win.on('closed',()=>{
win = null
})
}
},
{label: '颜色'},
]
},
{
label: '信息',
submenu:[
{label: '修改'},
{label: '查看'},
]
}
]
var m = Menu.buildFromTemplate(template)
Menu.setApplicationMenu(m)
// 在main.js 应用menu
require('./main/menu.js')
设置右键菜单
1
2
3
4
5
6
7
8
9
10
11
12
13
14const {remote} = require('electron')
var rightTemplate = [
{label:'复制',accelerator:'ctrl+c'},
{label:'粘贴',accelerator:'ctrl+v'}
]
var m = remote.Menu.buildFromTemplate(rightTemplate)
window.addEventListener('contextmenu',function(e){
e.preventDefault()
m.popup({
window:remote.getCurrentWindow()
})
})
- 粘贴板
1 | const {clipboard} = require('electron') |
……后续再说吧
3.编译打包
Electron 支持跨平台打包,官方推荐使用electron-builder 拥有更丰富的功能且支持更多平台。
- 安装依赖
1 | yarn add electron-builder --save-dev |
在
package.json中做如下配置1
2
3
4
5
6
7
8
9
10
11
12"build": {
"appId": "com.xxx.app",
"mac": {
"target": ["dmg","zip"]
},
"win": {
"target": ["nsis","zip"]
}
},
"scripts": {
"dist": "electron-builder --win --x64"
},在命令行中执行
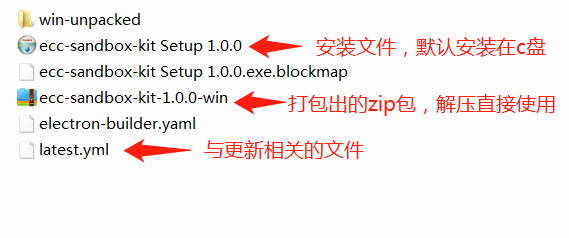
npm run dist,打包后在dist目录生成如下文件:总结
1、electron-builder 可以打包成msi、exe、dmg文件,macOS系统,只能打包dmg文件,window系统才能打包exe,msi文件;
2、几乎支持了所有平台的所有格式;
3、支持Auto Update;
4、支持CLI和JS API两种使用方式;
后续更新electron-vue的开发流程,希望可以将electron与flask、pytorch结合。开发一个cv处理工具。
代码参见:https://github.com/kid1999/electron-study
参考:
本博客所有文章除特别声明外,均采用 CC BY-NC-SA 4.0 许可协议。转载请注明来自 Kid1999' Blog!


